Specialist software
Guidance on accessing specific software on your own device.
About specialist software
Some specialist software has specific instructions on how to install it on your own device.
Depending on your network connection, you may find it faster to install software on your own device whilst on-campus and connected to eduroam. Once installed, you can relaunch the software as and when needed.
For software not listed, please follow the standard guidance for launching software via AppsAnywhere.
AppsAnywhere does not support Chromebooks, Windows 10 or Windows 11 in S mode, mobile or tablet devices.
Software versions
Search for the software in AppsAnywhere to see the software version, download instructions, licensing and VPN details, and a whole lot more.
You can use your own licenced versions of software, but if you decide to use UWE Bristol licenced software instead, you must first uninstall any previous versions or trials.
Software installation guides
Specific instructions for installing the following software on your own device:
Abaqus
- On a UWE Bristol PC – specific software locations can be found via software by group.
- Install on your own device – launch using Cloudpaging Player following the steps below.
Abaqus requires a UWE VPN connection.
Please note: the download needs a sturdy connection and may take some time.
- Once UWE VPN is installed and connected, go to https://appsanywhere.uwe.ac.uk and use your UWE Bristol email and password to log in.
- Search for Abaqus and click Launch to activate Cloudpaging Player.
Cloudpaging Player will advise 'Abaqus was added to your list of applications'. The player will show 'Pre-fetching', 'Activating' then 'Virtualising' up to 100%. - The app will open and you can start using Abaqus.
In the background Cloudpaging Player will continue 'Paging the remainder' up to 100%, then it'll show as 'Running'.
Adobe Creative Cloud
If your course requires Adobe Creative Cloud you will have access to it in AppsAnywhere.
If your course does not require Adobe Creative Cloud you can still access it from a computer on campus.
- On a UWE Bristol PC – specific software locations can be found via software by group.
- Install on your own device – download through AppsAnywhere following the steps below.
Creative Cloud is available via a secure download.
Please note: the download needs a sturdy connection and may take some time.
- Go to https://appsanywhere.uwe.ac.uk and use your UWE Bristol email and password to log in.
- Search for Adobe Creative Cloud and click Download to get the installer.
- Once downloaded extract the zip file and enter the folder.
- Double-click setup.exe and click Yes to the admin prompt, then wait a while for the installation to complete.
- Click OK and launch the Creative Cloud app from your start menu.
- Sign in with your UWE Bristol email. This will take you to a single sign-on screen, then finish logging in with your UWE Bristol password.
- Creative Cloud will now have all the programs available to download, select a program and click Install.
- Once complete launch the app from your start menu.
Ansys
- On a UWE Bristol PC – specific software locations can be found via software by group.
- Install on your own device – launch using Cloudpaging Player following the steps below.
Ansys requires a UWE VPN connection.
Please note: the download needs a sturdy connection and may take some time.
- Once the UWE VPN is installed and connected, go to https://appsanywhere.uwe.ac.uk and use your UWE Bristol email and password to log in.
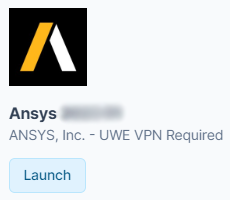
- Search for Ansys and click Launch:
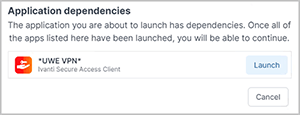
- Within the UWE VPN window select Launch, then select Launch app to activate Cloudpaging Player:
- Cloudpaging Player will advise 'Ansys was added to your list of applications'. The player will show 'Pre-fetching', 'Activating' then 'Virtualising' up to 100%.
Troubleshooting: If the software launches and you see an error screen, close Ansys and wait until the Cloudpaging Player status is Ready.
Ansys is now ready to use.
ArcGIS Pro
This guidance is for Windows only, the ArcGIS Pro app is not available for Mac.
More information can be found via Accessing ArcGIS Pro From Home.
- On a UWE Bristol PC – specific software locations can be found via your college.
- Install on your own device – download through AppsAnywhere following the steps below.
ArcGIS Pro requires a secure download.
Please note: the download needs a sturdy connection and may take some time.
- Go to https://appsanywhere.uwe.ac.uk and use your UWE Bristol email and password to log in.
- Search for ArcGIS Pro click Download and save the 2GB archive file to your computer.
- Once downloaded extract the file to a folder
- Once extracted open the folder and find the file called Install, right-click on it and choose Run as administrator, accept the prompt and then proceed through the install.
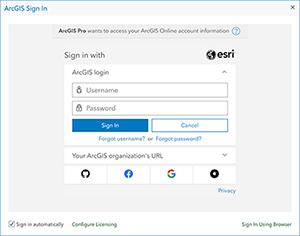
- Once complete open the Start Menu and find and open ArcGIS Pro, next you will need to log in to use the software.
You should have had an account created for you by your college, check your emails from ArcGIS Notifications to finish setting up your account. Use this account and password to log in to the program:
Autodesk AutoCAD
- Windows only (not available for Mac)
- On a UWE Bristol PC – specific software locations can be found via software by group.
- Install on your own device – download from Autodesk following the steps below.
First, you will need to create an Autodesk Educational account with a one year licence, then you can install AutoCAD on your own computer.
Create an Autodesk Educational account with a one year licence
- Go to https://accounts.autodesk.com/register and create an account using your UWE Bristol email address.
- Verify your Autodesk account:
- Go to your UWE Bristol email.
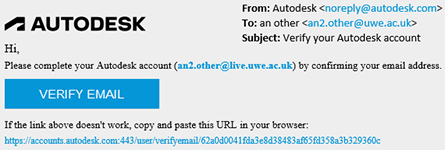
- Open the email you've just received from Autodesk asking you to verify your Autodesk account.
- Click VERIFY EMAIL, then you'll be redirected to your Autodesk Educational account information:
- It is recommended that you enable 2-step verification for signing in, this can be done in the Security tab of your account page and click Set up:

- Head to www.autodesk.com/education/edu-software/overview and select a program you need on your personal computer, then click Get started.
- You will be taken to a new page that may require you to sign in, afterwards you will be prompted to set up your education profile. Select the following options:
- Country, Territory, or Region: United Kingdom
- Educational role: Student
- Institution Type: University/Post-Secondary
Click NEXT and complete the following:
- Enter your date of birth
- Type and select: University of the West of England (Bristol)
- Select your enrolment date and expected graduation date (usually July and the length of your degree).
- Click Next, then return to www.autodesk.com/education/edu-software/overview and you will see a banner asking you to confirm your eligibility. Click GET STARTED:

- You will be taken to another page, double check your details and click CONFIRM.
- You may be asked to upload additional documentation; you have 14 days to upload your documents. The easiest and recommended document to upload would be your Status letter, which can be downloaded from MYUWE:
- Go to Your Info
- Find Your documents
- Download the PDF of the document titled Status letter.
- Upload your document to the Additional documentation needed page and click Submit.
- You should receive an email from Autodesk Education Community welcoming you to your one year educational access to Autodesk products, click GET PRODUCTS and select the software you need.
Now install AutoCAD on your own computer 
- Go to www.autodesk.com/education/edu-software/overview and sign in using your educational account.
- Find AutoCAD in the list of applications, select the version and click INSTALL.
- Once the installer downloads, open it and click Install again and wait for the installation to finish, this will take a while. You may be given the option to start using AutoCAD while it downloads, but it is recommended to let the install finish to avoid any issues or missing features.
- Once installed, on the next screen click the Already have a license? link on the bottom right.
- Click on Switch User to make AutoCAD relaunch. Ignore any error messages if they appear.
Troubleshooting: If AutoCAD doesn't relaunch, click the Other user icon. - Sign in with your Autodesk Educational account.
AutoCAD is now ready to use.
Autodesk Maya
- Windows only (not available for Mac).
- On a UWE Bristol PC – specific software locations can be found via your college.
- Install on your own device – download from Autodesk following the steps below.
First, you will need to create an Autodesk Educational account with a one year licence, then you can install it on your own computer.
Create an Autodesk Educational account with a one year licence
- Go to https://accounts.autodesk.com/register and create an account using your UWE Bristol email address.
- Verify your Autodesk account:
- Go to your UWE Bristol email.
- Open the email you've just received from Autodesk asking you to verify your Autodesk account.
- Click VERIFY EMAIL, then you'll be redirected to your Autodesk Educational account information:

- It is recommended that you enable 2-step verification for signing in, this can be done in the Security tab of your account page and click Set up:

- Head to www.autodesk.com/education/edu-software/overview and select a program you need on your personal computer, then click Get started.
- You will be taken to a new page that may require you to sign in, afterwards you will be prompted to set up your education profile. Select the following options:
- Country, Territory, or Region: United Kingdom
- Educational role: Student
- Institution Type: University/Post-Secondary
Click NEXT and complete the following:
- Enter your date of birth
- Type and select: University of the West of England (Bristol)
- Select your enrolment date and expected graduation date (usually July and the length of your degree).
- Click Next, then return to www.autodesk.com/education/edu-software/overview and you will see a banner asking you to confirm your eligibility. Click GET STARTED:

- You will be taken to another page, double check your details and click CONFIRM.
- You may be asked to upload additional documentation; you have 14 days to upload your documents. The easiest and recommended document to upload would be your Status letter, which can be downloaded from MYUWE:
- Go to Your Info
- Find Your documents
- Download the PDF of the document titled Status letter.
- Upload your document to the Additional documentation needed page and click Submit.
- You should receive an email from Autodesk Education Community welcoming you to your one year educational access to Autodesk products, click GET PRODUCTS and select the software you need.
Now install Maya on your own computer 
- Go to www.autodesk.com/education/edu-software/overview and sign in using your educational account.
- Find Maya in the list of applications, select the version and click INSTALL.
- Once the installer downloads, open it and click Install again and wait for the installation to finish, this will take a while. You may be given the option to start using Maya while it downloads, but it is recommended to let the install finish to avoid any issues or missing features.
- Once installed, on the next screen click the Already have a license? link on the bottom right.
- Click on Switch User to make Maya relaunch. Ignore any error messages if they appear.
Troubleshooting: If Maya doesn't relaunch, click the Other user icon. - Sign in with your Autodesk Educational account.
Maya is now ready to use.
Autodesk Revit
- Windows only (not available for Mac).
- On a UWE Bristol PC – specific software locations can be found via software by group.
- Install on your own device – download from Autodesk following the steps below.
First, you will need to create an Autodesk Educational account with a one year licence, then you can install Revit on your own computer.
Create an Autodesk Educational account with a one year licence
- Go to https://accounts.autodesk.com/register and create an account using your UWE Bristol email address.
- Verify your Autodesk account:
- Go to your UWE Bristol email.
- Open the email you've just received from Autodesk asking you to verify your Autodesk account.
- Click VERIFY EMAIL, then you'll be redirected to your Autodesk Educational account information:

- It is recommended that you enable 2-step verification for signing in, this can be done in the Security tab of your account page and click Set up:

- Head to www.autodesk.com/education/edu-software/overview and select a program you need on your personal computer, then click Get started.
- You will be taken to a new page that may require you to sign in, afterwards you will be prompted to set up your education profile. Select the following options:
- Country, Territory, or Region: United Kingdom
- Educational role: Student
- Institution Type: University/Post-Secondary
Click NEXT and complete the following:
- Enter your date of birth
- Type and select: University of the West of England (Bristol)
- Select your enrolment date and expected graduation date (usually July and the length of your degree).
- Click Next, then return to www.autodesk.com/education/edu-software/overview and you will see a banner asking you to confirm your eligibility. Click GET STARTED:

- You will be taken to another page, double check your details and click CONFIRM.
-
You may be asked to upload additional documentation; you have 14 days to upload your documents. The easiest and recommended document to upload would be your Status letter, which can be downloaded from MYUWE:
- Go to Your Info
- Find Your documents
- Download the PDF of the document titled Status letter.
- Upload your document to the Additional documentation needed page and click Submit.
- You should receive an email from Autodesk Education Community welcoming you to your one-year educational access to Autodesk products, click GET PRODUCTS and select the software you need.
Now install Revit on your own computer 
- Go to www.autodesk.com/education/edu-software/overview and sign in using your educational account.
- Find Revit in the list of applications, select the version and click INSTALL.
- Once the installer downloads, open it and click Install again and wait for the installation to finish, this will take a while. You may be given the option to start using Revit while it downloads, but it is recommended to let the install finish to avoid any issues or missing features.
- Once installed, on the next screen click the Already have a license? link on the bottom right.
- Click on Switch User to make Revit relaunch. Ignore any error messages if they appear.
Troubleshooting: If Revit doesn't relaunch, click the Other user icon. - Sign in with your Autodesk Educational account.
Revit is now ready to use.
Google Fonts
- On a UWE Bristol PC – specific software locations can be found via software by group.
- Install on your own device – launch using AppsAnywhere following the steps below.
On your own device or UWE Bristol PC, access Google Fonts through AppsAnywhere to an external link:
- Go to https://appsanywhere.uwe.ac.uk and use your UWE Bristol email and password to log in.
- Search for Google Fonts and click Visit Site to open the external link in a new tab.
- Browse the font families or search for a specific font. Once a font is chosen, select Download Family in the top right of the screen to save a local zipped file:

- Extract the zipped file - save any files you wish to keep to OneDrive:

- Open the extracted folder and double-click the font you wish to use to open a preview window, then select Install:

Please note: if you use a non-system font in your project, you may need to install it on each computer to use.
Keyshot
This guidance is for Windows only, the Keyshot app is not available for Mac.
- On a UWE Bristol PC – specific software locations can be found via software by group.
- Install on your own device – launch using Cloudpaging Player following the steps below.
Keyshot requires a UWE VPN connection.
Please note: the download needs a sturdy connection and may take some time.
- Once UWE VPN is installed and connected, go to https://appsanywhere.uwe.ac.uk and use your UWE Bristol email and password to log in.
- Search for Keyshot and click Launch to activate Cloudpaging Player:
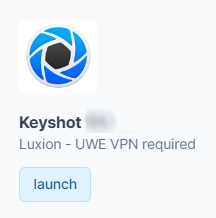
Cloudpaging Player will advise 'Keyshot was added to your list of applications'. The player will show 'Pre-fetching', 'Activating' then 'Virtualising' up to 100%. - The app will open and you can start using Keyshot.
In the background Cloudpaging Player will continue 'Paging the remainder' up to 100%, then it'll show as 'Running'.
MATLAB
- On a UWE Bristol PC – specific software locations can be found via software by group.
- Install on your own device – launch using MathWorks following the steps below.
Please note: We currently install MATLAB 2025a version on UWE campus computers. Make sure the version you are downloading is compatible with the version on campus.
- Sign in to your MathWorks Account or create a new one with your UWE email.
- Download your products from MathWorks Downloads.
- Follow the prompts to install the products for which you are licensed.
NI LabVIEW
This guidance is for Windows only, the NI LabVIEW app is not available for Mac.
If you intend to install NI software on a Mac, please email the NI Technical Support team at technical.support@ni.com so they can generate a unique activation for you.
- On a UWE Bristol PC – specific software locations can be found via software by group.
- Install on your own device – download through AppsAnywhere following the steps below.
NI LabVIEW requires a secure download.
Please note: the download needs a sturdy connection and may take some time.
- Go to https://appsanywhere.uwe.ac.uk and use your UWE Bristol email and password to log in.
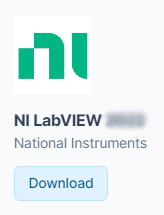
- Search for NI LabVIEW and click Download to get the LabVIEW installer:
- Once downloaded open the installer.
If you get a 'User Account Control' prompt select Yes. - Tick I accept the above license agreement.
- Choose Disable Windows fast Startup (Recommended).
- At the Select products window, check that Vision Development Module, NI-IMAQ drivers are ticked and leave any other default section are they are, then click Next twice.
- Accept any further license agreements if prompted and click Next three times.
- Allow the application to install, this may take several hours depending on your hardware and your broadband speed.
- After the installation completes you will get a pop-up to enable updates, click Yes/OK.
- You will then be asked to join the NI Customer Experience Improvement Program; tick No and then click OK.
Activation of NI LabVIEW on your computer 
- Once installed you will receive a prompt to Activate the software, click Log in to activate.
You can also launch NI LabVIEW from the Start menu. - Click Create Account and use your UWE Bristol email address, then select the following options:
- Role: Student
- Company: University of the West of England
- Let it autocomplete the address fields.
- You will be sent a verification email which you will need to access to complete the account activation.
- Go back to the Activate software window and click Log in to activate, then sign in with your newly created account.
- Click on the drop-down menu for Check my account for licences and select Enter a serial number.
- When prompted use the serial number from AppsAnywhere for LabVIEW.
Please note: if you have previously installed other NI software, you may need to scroll to find LabVIEW. - Click Activate and a prompt will state that the activation was successful.
- Click Finish.
- Reboot your machine and LabVIEW will be ready to use.
NI Multisim
This guidance is for Windows only, the NI Multisim app is not available for Mac.
If you intend to install NI software on a Mac, please email the NI Technical Support team at technical.support@ni.com so they can generate a unique activation for you.
- On a UWE Bristol PC – specific software locations can be found via software by group.
- Install on your own device – download through AppsAnywhere following the steps below.
NI Multisim requires a secure download.
Please note: the download needs a sturdy connection and may take some time.
- Go to https://appsanywhere.uwe.ac.uk and use your UWE Bristol email and password to log in.
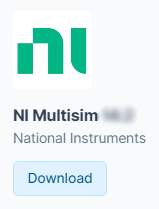
- Search for NI Multisim and click Download to get the Multisim installer:
- Once downloaded double-click ni-cds-educational_<version number>_offline.iso.
- Double-click Install.exe and click Yes to the NI Package Manager Preinstall admin prompt.
- Leave the default options as they are and click Next.
- Accept any license agreements if prompted and click Next three times.
- Click OK on any further prompts throughout the install.
Activation of NI Multisim on your computer 
- Once installed you should get a prompt to Activate the software, click Log in to activate.
You can also launch NI Multisim from the Start menu. - Click Create Account and use your UWE Bristol email address, then select the following options:
- Role: Student
- Company: University of the West of England
- Let it autocomplete the address fields.
- You will be sent a verification email which you will need to access to complete the account activation.
- Go back to the Activate software window and click on Log in to activate, then sign in with your newly created account.
- Click on the drop-down menu for Check my account for licences and select Enter a serial number.
- When prompted use the serial number from AppsAnywhere for Multisim.
Please note: if you have previously installed other NI software, you may need to scroll to find Multisim. - Click Activate and a prompt to state that activation was successful.
- Click Finish.
- Reboot your machine and Multisim will be ready to use.
Rhino
- On a UWE Bristol PC – specific software locations can be found via software by group.
- Install on your own device – launch using Cloudpaging Player following the steps below.
Rhino requires a UWE VPN connection.
Please note: the download needs a sturdy connection and may take some time.
- Once UWE VPN is installed and connected, go to https://appsanywhere.uwe.ac.uk and use your UWE Bristol email and password to log in.
- Search for Rhino and click Launch to activate Cloudpaging Player to download the software. Rhino will launch once complete.
- On the getting started screen enter your UWE Bristol email and tick the licence agreement.
- When the program tells you that your account has a licence ready to use, click Login as (your UWE Bristol email).
- A browser window will appear and ask you to log in to your Rhino account. Use your UWE Bristol email and click the blue arrow.
- Complete the login by clicking the blue box that has 'live.uwe.ac.uk' on it.
Rhino will open and is now ready to use.
Sketchup Pro with V-Ray
This guidance is for Windows only, the Sketchup Pro with V-Ray app is not available for Mac.
- On a UWE Bristol PC – specific software locations can be found via software by group.
- Install on your own device – launch using Cloudpaging Player following the steps below.
- Go to https://appsanywhere.uwe.ac.uk and use your UWE Bristol email and password to log in.
- Search for V-Ray for SketchUp and click Launch to activate Cloudpaging Player:
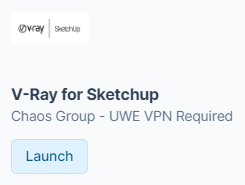
Cloudpaging Player will advise 'SketchUp Pro with V-ray has been added to your list of applications'. It will start 'Pre-fetching', up to 100%, then show as 'Activating', then 'Virtualising'. - The app will open and you can start using SketchUp Pro with V-Ray.
In the background Cloudpaging Player continues 'Paging the remainder' up to 100%, then shows as 'Running'.
SolidWorks
 On a UWE Bristol PC – specific software locations can be found via software by group.
- Install on your own device – download through AppsAnywhere following the steps below.
Please note: the download needs a sturdy connection and may take some time.
- Go to https://appsanywhere.uwe.ac.uk and use your UWE Bristol email and password to log in.
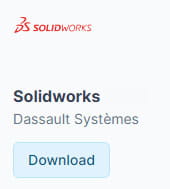
- Search for Solidworks and click Download and save the zipped file to your computer:
- Once downloaded extract the file which is large and will take some time.
- Unzip the SOLIDWORKS_2024_SP3.1.zip file and follow the installation instructions using the key in the Home_Use_Licence_key.txt.
- Double-click the Install icon.
- Click Yes to the 'Do you want to allow this app to make changes to your device' prompt.
Troubleshooting: If you see a message about a pending reboot, click cancel and reboot your PC, then return to step 4. - Wait until the installation is finished before using Solidworks. It's a large app and can take over an hour to install.
Further assistance
If you need assistance with the installation or functionalities of SolidWorks, and technicians or course tutors cannot help, please visit SolidWorks Support.
V-Ray for Revit
This guidance is for Windows only, the V-Ray for Revit app is not available for Mac.
- On a UWE Bristol PC – specific software locations can be found via software by group.
- Install on your own device – launch using Cloudpaging Player following the steps below.
V-Ray for Revit requires a UWE VPN connection.
Please note: the download needs a sturdy connection and may take some time.
- Once UWE VPN is installed and connected, go to https://appsanywhere.uwe.ac.uk and use your UWE Bristol email and password to log in.
- Search for V-Ray for Revit and click Launch to activate Cloudpaging Player:
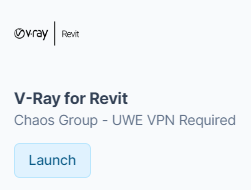
Cloudpaging Player will advise 'V-Ray for Revit was added to your list of applications'. The player will show 'Pre-fetching', 'Activating' then 'Virtualising' up to 100%. - The app will open and you can start using V-Ray for Revit.
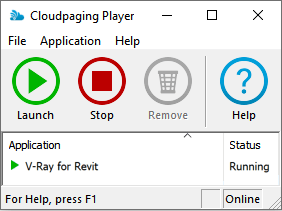
In the background Cloudpaging Player will continue 'Paging the remainder' up to 100%, then it'll show as 'Running':
V-Ray for Rhino
This guidance is for Windows only, the V-Ray for Rhino app is not available for Mac.
- On a UWE Bristol PC – software locations can be found via software by group.
- Install on your own device – launch using Cloudpaging Player following the steps below.
V-Ray for Rhino requires a UWE VPN connection.
Please note: the download needs a sturdy connection and may take some time.
- Once UWE VPN is installed and connected, go to https://appsanywhere.uwe.ac.uk and use your UWE Bristol email and password to log in.
- Search for V-Ray for Rhino and click Launch to activate Cloudpaging Player:
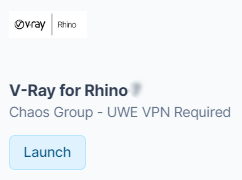
Cloudpaging Player will advise 'V-Ray for Rhino was added to your list of applications'. The player will show 'Pre-fetching', 'Activating' then 'Virtualising' up to 100%. - The app will open and you can start using V-Ray for Rhino.
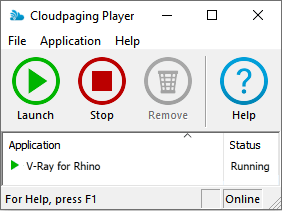
In the background, Cloudpaging Player will continue 'Paging the remainder' up to 100%, then it'll show as 'Running':
You may also be interested in

Student computers
Useful information relating to UWE Bristol student computers and their facilities.

eduroam - free campus wifi
How to connect to the free campus wifi (eduroam).
Printing
How to print at UWE Bristol.
