Service detail cards
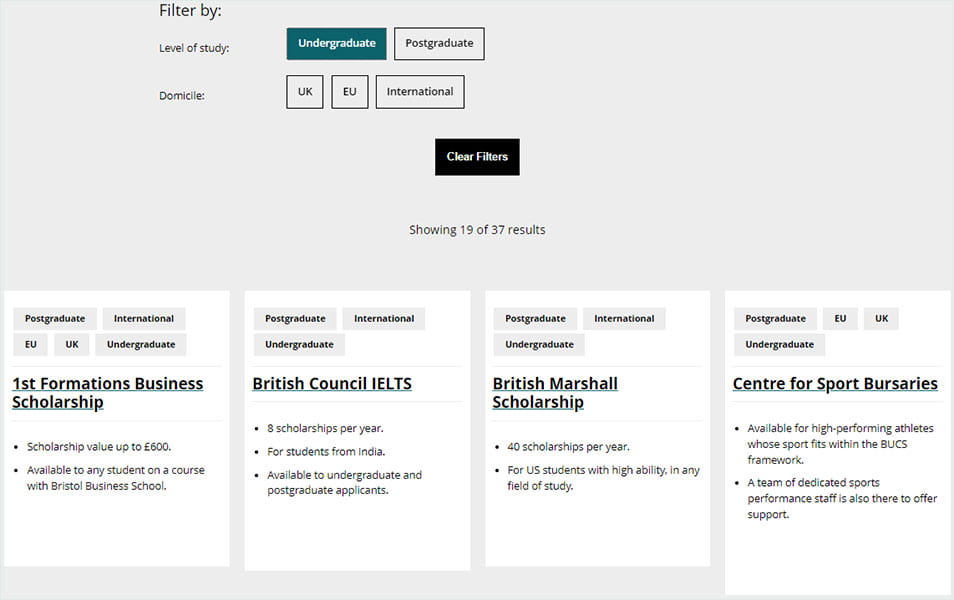
Service detail card example

Why use service detail cards
Service detail cards display as a set of cards on a Service filter page template. They cannot be used on any other page template.
The cards offer a summary of the page being linked to and include contact details and bullet points to highlight key information, such as deadlines or eligibility criteria.
You can add images to cards but in most cases on the website, cards are text only.
Cards can also be tagged with search categories that will appear as filter options at the top of the Service filter page. For example the scholarships and bursaries page presents 40+ scholarships categorised by 'level of study' and 'domicile', allowing students to find scholarships relevant to them.
When to use service filter cards
When considering using service detail cards, ask yourself:
- Will users benefit from being able to filter the content?
- Are there clear, useful categories that can help to sort and filter the cards?
- Can the card link to a web page?
- Will there be enough cards to justify a filterable set of cards?
If the content is simple enough to browse without service filters, consider a manual block of cards instead.
How to create service detail cards
- Create the service detail cards in the relevant component folder
- Add the cards to the relevant service filter page via a picker
Creating a service detail card
- Navigate to the relevant component folder in Content Editor.
- Right click on the folder > Insert Service detail card.
- Give the card a name.
- Add the link in the Service Detail Card Link field and include link text (this will become the visible card heading).
- Add an image (optional).
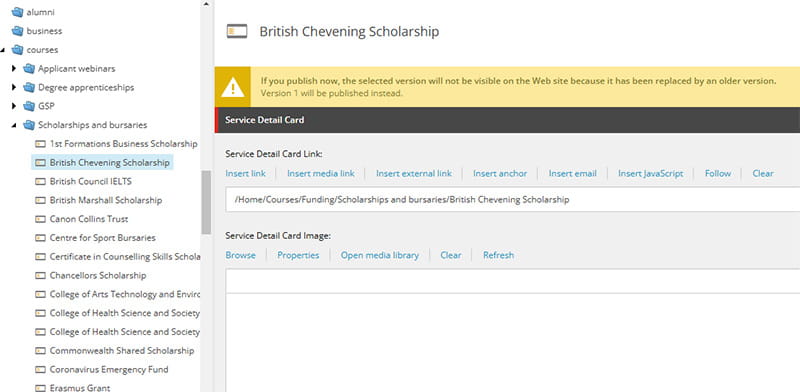
- Add information to at least one of the bullet point fields.
- Add contact information to the telephone number and/or email address fields (optional).
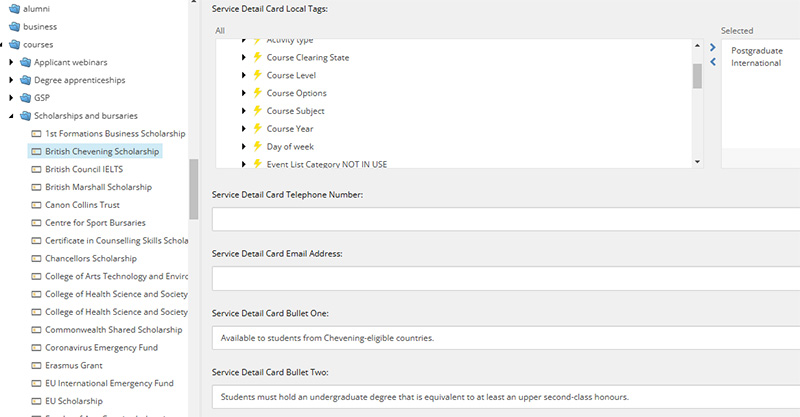
- Use the Service detail card local tags picker to find the relevant local tags and assign them to the card.
- Save the card.
Required fields
- Each service filter card must include a link, which can be a web page link, an anchor within a web page or an email address.
- You must add link text to the service detail card link. This field automatically generates the heading or title of the service filter card.
Recommended word count
You must include one to three bullet points on a service filter card. The bullet points should be concise to fit within the limited space.
|
Bullet point text |
100 characters |
Add a service detail card to a service filter page
- Navigate to the relevant service filter page in the Content Editor and Review > Edit.
- Scroll to the Service Filters Detail Cards section.
- Locate your new card in the relevant service detail cards component folder.
- Select the card and use the right arrow to add the card to the Selected window (see screenshot).
- Highlight the card in the Selected window and use the up and down arrows on the right-hand side to position the card in the correct place in the list. The list order is reflected on the service filter page.

- Save and Preview the page.
- If your card is ready to publish, Review > Submit > Approve* the card in the component folder before you review > Submit > Approve the Service Filter page.
*If you don’t have approval permissions, you can submit the service detail card and the service filter page to the approval queue for the Web Team to review and approve.
Tagging service filter cards
You can add and remove tags to a service detail card via a picker in Content Editor.
These tags must be selected also on the service filter page where the card appears (see screenshot).
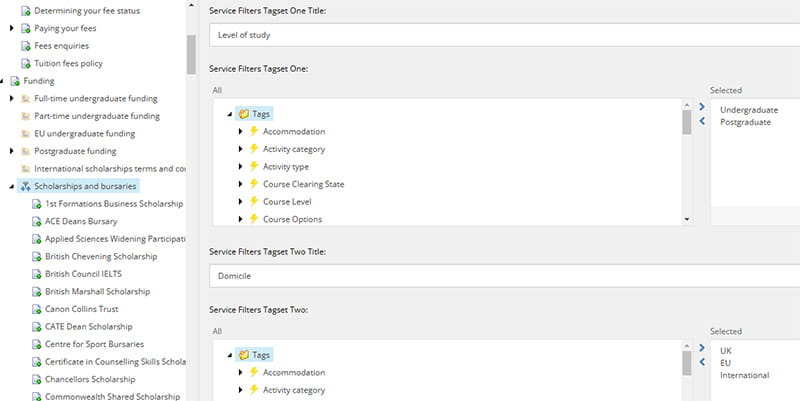
Tags must be unique. Do not reuse existing tags from another service filter page or search experience, even if there is a tag that already exists with a relevant name.
Tags need to be created under Global > Tags folder in Sitecore. If you need a new tag, please contact the Web Team: webeditors@uwe.ac.uk.
