Measuring solid objects automatically
Innovative techniques developed at UWE Bristol for measuring the dimensions of difficult solid objects automatically in challenging environments have been taken up and used commercially.
Couriers and freight handlers now use it to measure the sizes of packages. Other companies have used it to measure wheel alignment for cars, the detection of defects in ceramic tiles and for quality control in the aggregates industry.
Pioneering research
UWE Bristol’s Centre for Machine Vision (CMV, formerly the Machine Vision Laboratory) has long been a pioneer of practical automatic techniques to measure, inspect and analyse surfaces using a process known as photometric stereo (PS). Before CMV’s discoveries in the 1990s, existing techniques were unable to capture high-resolution 3D surface topography if it was camouflaged by complex features such as patterns in reflectance or colour, preventing the identification of objects under these circumstances.
Research led by CMV’s Director, Professor Melvyn Smith, has resulted in three key breakthroughs:
- The research developed techniques to extract a ‘bump map’ from objects – a 3D texture that can be ‘peeled off’ a surface, allowing the colour, 3D texture and underlying surface to be isolated and inspected from any angle.
- CMV was the first to succeed in doing this for moving objects or ones with non-rigid surfaces – previous techniques could only do so in a static way.
- CMV’s method works with cheap off-the-shelf lights placed close by – a crucial advance on previous PS-based methods which only worked in a lab setting with idealised illumination, such as a small specialist lighting source at a distance.
CMV’s solution operates in unconstrained moving, cluttered, changing or confined environments, integrating existing techniques to arrive at a new dynamic form of PS. In a series of new insights from 2000 to 2007, the research enabled the capture of any convex object using just six non-specialist light sources and low-cost hardware. This meant it was now possible to address challenging imaging tasks, such as measuring and characterising 3D objects within complex scenes – opening up possibilities for real-world commercial usefulness.
Use by freight industry
This caught the attention of US company Quantronix. Working with them, CMV developed a system that could rapidly capture any 3D object up to 3m x 3m x 3m (see diagram). Having been successfully patented, it was ultimately developed into a full commercial product, the Cubiscan 1000-VS, which became available in 2009. Since then, it has been sold to organisations around the world, including FedEx and the UK’s Ministry of Defence.
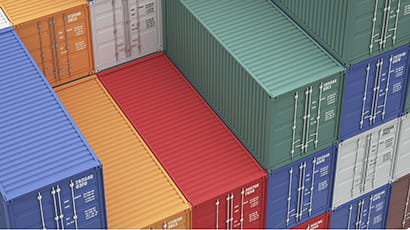
Companies such as couriers, freight handlers and airlines have used it to measure the sizes of packages automatically. This has proved both faster and more accurate than manual measurement. By mid-2013, one airline company reported that it was able to recoup the cost of the system and its installation within three weeks of operational implementation. Another company said the system had generated over $1 million extra revenue over the course of a year.
The introduction of such an efficient system for capturing dimensions has influenced the US trucking, cargo and parcel shipping industry in its trade discussions about the best charging structure for its customers, as it is now easier to take into account spatial dimensions as well as weight. As a result, there is considerable interest in moving away from complex commodity codes to simpler pricing scales.
The companies have also been able to achieve new operational efficiencies because the spatial data captured has enabled them to improve their planning of storage and shipping space, and retrieval of loads by their workforce. This in turn reduces fuel consumption, pollution and use of packaging, with consequent environmental benefits.
Use in wider industry
The research has also found application in the automotive industry. In collaboration with a company in India from 2011 onwards, CMV has developed a device that measures the alignment of car wheels - optically, without contact - minimising subjective human judgements and operator error, and giving faster throughput.
In collaboration with a global machine vision company, CMV has developed a system that characterises and detects defects in 2D surfaces. It has been used around the world for quality control in the manufacture of ceramic tiles.
CMV’s system has also been developed into commercially available equipment used to measure and test automatically the properties of gravel and crushed rock, and is used by the construction mineral industry. It characterises the geometry of particles in a sample. It is used, for example, by Austrian Railways to test the railway ballast they buy from quarries. They are also using it to assess the suitability of material from tunnel excavations as aggregates for concrete.
The consistent record of innovation at CMV has therefore been of use to a host of companies in a range of industries, meeting their real-world needs.
Contribution to the UN 2030 sustainable development goals
UWE Bristol is proud to align our research to the UN sustainable development goals. The above research aligns with the following goals:
Breaking research boundaries
We’re tackling the big issues of today and tomorrow head on. This is big, brave thinking for a better future. It’s research done well. Research with the power to transform lives, transform the future.
Breaking research boundariesYou may also be interested in

Research in the College of Arts, Technology and Environment
The College of Arts, Technology and Environment (CATE) has a well-established and continuously developing research environment.

Centre for Machine Vision (CMV)
Find out more about how the Centre for Machine Vision is a major research collaboration between UWE Bristol and the University of Bristol.

News
The latest news stories from across UWE Bristol.

